Navigator Solutions |
This section describes the processes involved in installing and configuration of the Navigator WMS solution.
Ensure that IIS is installed. Create a web site for Navigator, and set the home directory to the folder in which the Navigator WMS web interface resides. Edit the web.config file to set the connection string the web interface uses to connect to the database.
Run Internet Explorer from the server, and browse to:
http://localhost/SetupWizard.aspx
This page will install the default configuration parameters in the database including:
Once you have run the setup wizard, you may log into Navigator with the default username / password of "admin" / "scanning".
To allow a mobile connection to the server, obtain a Navigator license code from your integrator. Enter a new system variable called LICENSE_CODE. The value of this variable must be the license code provided to you.
If you do not enter a license code and attempt to make a mobile device connection, the connection attempt will fail with the message "Invalid variable name LICENSE_CODE". If this occurs, enter the license code and re-attempt the connection.
Run the NavigatorSocketsSetup.msi installation program.
Edit the c:\Program Files (x86)\Navigator Solutions\Navigator Sockets\NavigatorProtocol2Service.exe.config file to include the database server details.
Run the 'cmd' program as an Administrator.
Install the Windows Service by running:
C:\Windows\Microsoft.NET\Framework\v2.0.50727\InstallUtil c:\Program Files (x86)\Navigator Solutions\Navigator Sockets\NavigatorProtocol2Service.exe
From the services screen (run the services.msc command):
To test the installation:
Connect the CK3 device to your PC using Windows Mobile Device Centre (if using Windows 7) or ActiveSync (if using Windows XP). Note that a cradle and a micro usb cable will be required.
Download and install the Intermec-specific Wavelink Enabler from www.wavelink.com
Run the enabler. As part of the configuration, you may set the default IP address for the Avalanche server, or alternatively, you may print a 'scan to configure' sheet at a later time.
To use a 'Scan to configure' sheet with the CK3:
To connect directly via a USB cable:
Once you have connected to Avalanche successfully, the Navigator WMS software icon will appear on the Avalanche main menu. To run the software, double tap on the icon. It is possible to have Avalanche automatically run the software after a set period of time.
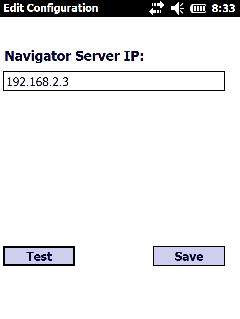
Navigator WMS will automatically prompt for the name or IP address of the Socket server if detects that the configuration file is missing.


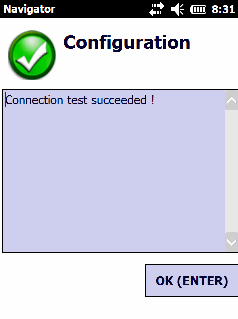
Enter the IP address and press the Test button to confirm that the address is accurate. If the test is successful, click the 'Save' button. The IP address is automatically saved and will be used each time the software is run.
At this point, you are ready to log in to Navigator from the mobile scanner.
Use the VoiceConsole update utility to download the configuration to the device, including wireless parameters, IP address settings and VoiceConsole address. The utility will reboot the device once the download is complete.
At this point, you may use the Operator button on the A500 to 'change task' - load the correct task as described by your integrator. Load the correct operator in a similar fashion.
You may also need to update the version of VoiceClient, depending on the configuration on VoiceConsole. The update may take 10-15 minutes and should only be done at the direction of your integrator.
To connect the Intermec SF51 scanner to the Vocollect A500, download and install the EasySet software from Intermec.com
1. Create a new configuration sheet using the SF51 profile.
2. Add the following barcodes to the sheet, in sequence:
a. Reset Factory Defaults except locked parameters.
b. Bluetooth - Security - Disable.
c. Bluetooth - Discoverable - Fully discoverable.
d. Bluetooth - Profile for communication - SPP - serial port profile.
e. Bluetooth - Connect/disconnect - Compose BT address : <BT ADDRESS OF THE A500> - (found under the battery)
Print the barcode sheet and scan each barcode in turn.
Select the A500 voice computer to which you want to pair the SF51 in Voice Console. Select 'Pair devices ->Pair Selected device to a peripheral' from the left menu.
The SF51 will issue 4 ascending tones and the Bluetooth light at the base of the scanner will glow blue. The Bluetooth light on the A500 will also be illuminated.
The pairing must take place before running the Navigator application on the A500. When the A500 is rebooted, the SF51 will re-connect automatically.
The following exceptions should be added to the Windows firewall on the server (s) running Navigator:
Avalanche: The firewall either must be turned off or add C:\Program Files\Wavelink\Avalanche\Service\WLAvalancheService.exe into Exceptions. Ports 1777,1778,1779,1780, and 1781 will also need to be open.
Navigator Voice Server: 1234
Navigator Sockets: 8236
VoiceConsole: 9090
Web Interface: 80
| Task | Command Line | Description |
| Replenishment Run | OSQL -S server -U username -P password -D database -S "exec Navigator_RunReplenishments" | Recalculates minimum stock balances for pick locations, and resets the replenishment priorities. This task should be run when the warehouse is not operating. |
| Import Products | c:\Program Files\Navigator\<ERP Interface Software.exe> PRODUCTS | Imports new stock codes and updates existing descriptions. |