RMA Processing
Navigator WMS is compatible with an optional add-on module for RMA processing. Using this module, it is possible to track both serialized and non-serialized stock items as they are returned from customers. The RMA module includes a desktop client to allow for:
- production of RMA documents
- automatic creation of Controlled Return consignment notes via Startrack Express' Despatcher program.
- logging of incident history and parts used in a repair
- logging of comments relating to individual serial numbers and products
Logging RMA Documents
When customers phone or fax return requests to the office, run the Navigator Desktop client to create a new RMA document. You may create RMA documents manually with all information keyed in by hand, or automatically, by entering multiple serial numbers.
Navigator will attempt to match the serial numbers against the original invoice on which they were sold and automatically retrieve the customer information including return address and the original sales order number.
As serial numbers returned together may be from multiple original sales orders, it is likely that Navigator will create multiple RMA documents (one per sales order). Once the RMA documents have been generated, each RMA document may be manually edited to include fault details and other comments.
If the RMA document is being created manually, you must search for the customer record and fill in the product / serial number details manually. To save the RMA document at any time, press F10. If you are working on an individual item on the RMA document, press F12 to save the item.
You may optionally produce a Controlled Return via the Startrack Despatcher system. This will produce a label and printed sheet to be posted to the customer. The consignment note number created by Despatcher should be added manually into the RMA document - as this is used to determine:
- If the customer has been sent an RMA; and
- The correct RMA to load on the scanner during a receipt process.
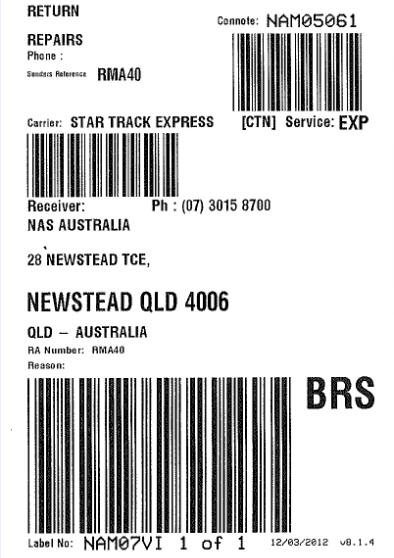 |
Sample Startrack Label
Once Navigator sends a file to Startrack Despatcher, a consignment label is generated and printed.
The label contains the return delivery address for the goods, in addition to the con note number in the top right hand corner of the label.
The barcode between the words "Carrier" and "Receiver" is the Navigator RMA number and can be scanned to receipt the goods back once the consignment arrives.
It is also possible to enter in the "Connote" field. Note that the barcode underneath the consignment note is actually a zone code and cannot be scanned into Navigator. The "label no" barcode at the bottom of the label is unique to each label produced and is not recorded in Navigator.
Note: Configuration of the Despatcher system and associated printers etc is outside the scope of this document. Please consult with your Startrack representative for more information |
Receipting Goods Against an RMA
 |
When returned goods arrive at the warehouse, you can use the Navigator Mobile software running on a scanner to check off items against the RMA document. To commence receipting, scan either:
- The consignment note number (if it is a controlled return)
- Any of the serial numbers in the box
- The RMA number barcode on the RMA document produced by Navigator
Navigator searches and will load the RMA details if it correctly locates a valid RMA document.
You may also search manually by partial customer name, customer reference, or partial consignment note by entering the search string and pressing F4. Navigator will search for valid, incomplete, RMA documents containing the search term and will display these in a grid format.
Use the arrow keys on the scanner to select the RMA document and press ENTER to load the RMA.
If you cannot find a valid RMA document to receipt the goods against, press ENTER (without entering a search term). Navigator allows the entry of a customer name and the inbound consignment note number and creates a new RMA document. From this point on, you may scan items to add them to the RMA. You can perform a search by customer and consignment note number to identify these items from the Navigator Desktop screen.
|
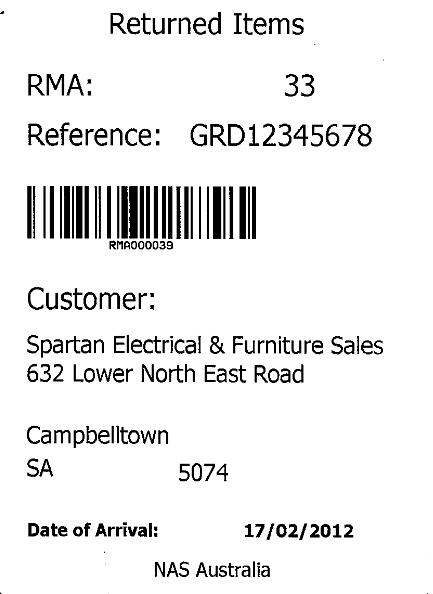 |
RMA Container Labels
When Navigator loads the RMA, it checks to see if there is an existing container associated with the RMA. Navigator will load the last container used on the RMA automatically, allowing you to continue to receipt items into the same container.
If Navigator cannot find an existing RMA label, it will print one for you. This label allows you to track the goods received from this point forward into cartons (or pallets).
The label is customisable, however, the main items listed on the label are as follows:
In the case that there are a large number of items being returned, you may elect to keep the stock in multiple boxes. When you have finished scanning the first box, press the F5 button on the scanner to review a list of containers associated with the RMA, and F5 again to print a new label.
Notes:
- Label numbers will not necessarily be sequential for a given RMA, because multiple staff members may be receiving RMA labels at the same time.
|
| |
|
Transferring RMA Containers
Once the goods have been received and placed into cartons / pallets etc, you may tell Navigator where the goods are currently being stored by using transaction 268 (Pallet Transfer). Navigator links items received against the RMA to the last container label it produced - from this point forward, the items will be
Scanning Items on the RMA
 |
Scan the product code if your item has a barcode. You may also enter the part number, or press F4 to search for the item you are receipting. You may also review the RMA item list and select the part number by pressing ENTER on the item to receive.
Navigator checks to ensure that the product code entered is valid and requests either a serial number or a quantity based on the parameters set within the WMS.
Scan the serial number or enter the quantity of goods received.
Navigator copes with situations in which your customer returns different items to the products on the RMA document by adding these items to the RMA.
If the item is valid, Navigator sets the "received on" date and logs the items as being part of the container created at the beginning of the process. For serialized items, Navigator also prints a label per item. This label contains the serial number, part number, date of receipt and RMA number.
If the return needs to be split across multiple cartons, keep like items together - there is only one container available per item type. Press F5 from the product prompt to create a new RMA label.
Use the F3 button to toggle the printing of individual barcode labels per RMA item. Use this option to produce a label per serialised device returned on the RMA.
|
 |
Press the F8 button to review a list of items received against the RMA document.
Fixing Mistakes
To undo the receipt of an item, select the correct row in the list and press the DELETE button on the scanner. Navigator will prompt you to undo the receipt. If you confirm, Navigator will:
|
| |
|
Processing RMA Documents on the Desktop
Using Navigator Desktop, you can load the RMA module to review a list of RMAs which require work. The default list shown to the user is RMA documents which have been received and are not complete.
Click on the RMA document to open the RMA form.
The Return Authorisation Form
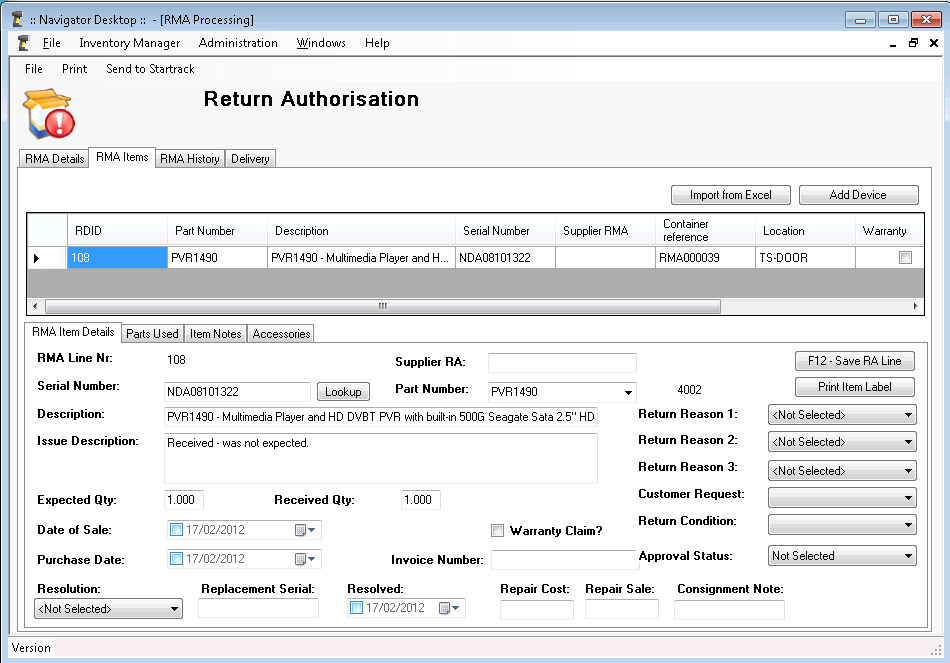
The RMA screen consists of a number of tabs. The first tab contains the RMA information including the customer name, account number, contact information etc. The second tab contains a list of items to be processed on the RMA and may include MANY items to be returned. Items may be either serialized or non-serialized. The list of items on the RMA is displayed in a grid at the top of the screen. The panel below shows details of the currently selected item.
For each line on the RMA (which relates to a single serial number, or product with a quantity), Navigator records the original invoice number the goods were sold on, the date of sale, the quantity received and a fault description.
Fields used on this screen include:
|
A unique number for this product/qty or product/serial number.
|
| If you send the devices to a third party who provides you with an RMA or reference number per serial number, enter it here. |
| This is the serial number of the item the customer is sending back for repair or evaluation. |
| Description of the product. |
| The part number of the item being returned. |
| A description of the problem being experienced with the product. |
| The quantity of items the customer is returning. |
| The quantity of items actually received back from the customer. |
|
The date the goods were sold to the customer.
|
|
A flag indicating whether the goods should be covered under warranty or not.
|
| The date of purchase from your supplier for this item. |
| The customer's invoice number. |
| A drop down list allowing selection of the outcome of the service relevant to the specific item. |
| The serial number the item is being replaced with (if applicable). |
| The date this item was resolved. |
| Cost to your company to repair/replace the item. |
| Amount charged to the customer for repairing / replacing the item. |
| The consignment note number of the goods returned to the customer if goods are returned in stages. |
Using this screen, you may print an individual barcode label for items on the RMA.
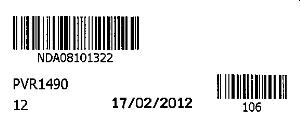
RMA Item Labels
This barcode label contains the serial number of the item in question, the part number, date of receipt, the RMA number and the RMA Line Number as a barcode:
Finalising RMA Documents
Once the RMA has been dealt with, select the Finalise option from the File menu. Navigator will prevent further changes to the RMA document once this date has been set.
During the finalise process, Navigator processes each line on the RMA depending on the value selected in the 'Resolution' field. The behaviour of Navigator is as follows:
Navigator does NOT alter any inventory balance in the warehouse.
Navigator uploads a Tax Invoice to Netsuite. |
Navigator does NOT alter any inventory balance in the warehouse.
Navigator uploads a Tax Invoice to Netsuite. |
Navigator receives the item back into the current user's site in the 'DEFAULT' location. Any serialized items are also added and marked as being 'in stock' in the current site.
To transfer the stock from service into the warehouse, perform an inventory transfer. |
Navigator receives the item back into the current user's site in the 'DEFAULT' location. Any serialized items are also added and marked as being 'in stock' in the current site.
To transfer the stock from service into the warehouse, perform an inventory transfer.
|